
External Lime Renders
 External lime renders were traditionally applied to both disguise and protect walls built of poor quality material such as rubble stone or porous brick and rough timber. They were usually covered with a colour wash or limewash which also provided additional protection.
This article concentrates on the types, condition and correct repair of rendered surfaces. It does not however cover all possible faults or aim to be a substitute for our specialist advice on practical techniques.
Types of Rendering
There is a wide range of finishes using lime render. Rubble walls of vernacular buildings were often covered with just a single render coat, amounting to not much more than a very full, flush pointing of the mortar. There was no attempt to create a flat surface finish so the undulations in the wall and even some of the stones themselves were not concealed. For a smarter appearance, often on more prestigious buildings, the aim would be for a much more uniformed flat surface finish. If the desired effect was to create the appearance of ashlar stonework then the rendered surface would be ruled into the top coat whilst damp. The illusion of joints might be further enhanced by tuck pointing the lines with a ribbon of lime putty. From the 16th century onwards in Wiltshire, many houses and cottages were rendered with a roughcast finish. This has a distinctive local character and pleasing appearance, which should be preserved. Compared with other renders roughcast has particularly good weathering properties. After any rain, the walls dry out quickly because of the relatively large surface area of roughcast compared to the flat surface of smooth render.
During the 18th and 19th centuries a smooth finish or 'stucco' was used, although not so much in Wiltshire as Bath stone was readily available. Some times the effects by the stucco artists were quite elaborate and full of subtleties. The finishing coat might be a composition of different coloured mortars, the colours changing between the lining out of the artificial joints.
Renders were always originally lime based, keeping the stone and timber dry beneath and allowing the walls to 'breathe'. Unfortunately, in recent years it has become common practice to use impervious cement rich renders. Because such renders are inflexible and non-porous unlike the traditional walling materials they cover, cracking occurs in the rendered surface, allowing water to penetrate and become trapped, causing stone, timber and brickwork to remain damp and begin to decay. Any moisture rising up through the wall from ground level will also become trapped. For these reasons never apply a cement rich render to old walls. Most failures of old renderings are attributable to water penetration usually resulting from poor maintenance or inadequate protection from the elements. Errors in technique and poor materials also play their part. Inappropriate repair methods and materials used to correct failures often contribute to the deterioration they set out to correct. Smooth stucco is most frequently in need of repair and is the most difficult to reproduce satisfactorily. Rendered walls should be checked for separation between coats or from the backing, crazing, powdering and crumbling on the surface. Where failure of the render has occurred over large areas, complete renewal may be the most appropriate course of action. This course of action is best determined by specialist advice. Unfortunately, many historic buildings have had their rendered surface unnecessarily removed, greatly affecting their architectural character.
Repair
Where areas of render are extensively cracked or sounding hollow, they should be cut out to the backing with square edges, or with slight undercut edges on all but the bottom. Where stucco is lined out cutting out should always follow the joint lines. Stucco that is not lined out should be cut out to rectangular shapes around the defective area. After cutting out, all dust, loose material, efflorescence and organic growth must be thoroughly removed using a bristle brush and biocide treatment. Any hollows and depressions should be dubbed out in as many coats as necessary to provide a flush finish, no coat thickness exceeding 10mm. Where timber framing is flush with the brickwork a non-ferrous mesh should be fixed on to the surface of the timber using non-ferrous or stainless steel fixing and covered with a 3mm - 6mm spatter-dash.
Mixing
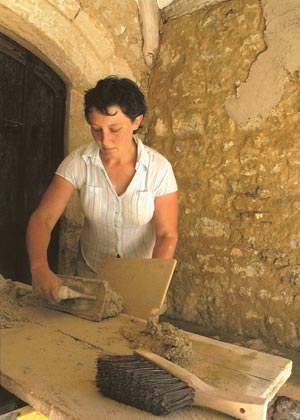
Basic lime render is mixed in the same way as a pointing mortar. A coarse sand gives a smooth finish suitable for most vernacular buildings, although the mix should be slightly richer in lime. When using a lime putty it must be at least three months old to ensure it is completely slaked and prevent any small eruptions or 'lime blows' to the finished surface. Do not use a soft fine sand as this will lead to cracking. The mix should be slightly wetter than a pointing mortar.
A typical mix using for the first two coats using either lime putty or hydraulic lime is, 2 lime: 5 sand, and the finishing coat 1 lime: 3 sand.
Drying times for undercoat should be at least 2 days in summer and 7 in winter
Application
Two-coat work is common but three-coat is to be recommended for all but the smallest stucco repairs. Each coat should be thinner and either the same strength or weaker than the last. The first coat should be 9 -16mm thick and finishing coats no thicker than 6 - 10mm. The final coat should be finished using a wood float or given a lightly scrapped finish using a fine hacksaw blade. For maximum adhesion between coats, each coat must be applied onto the next whilst the base is still green. The base should be dampened lightly before the next coat is applied to reduce the suction of moisture from the subsequent coat. Polythene sheeting or intermittent spraying of the surface may assist in maintaining the work in a green state until the next coat is applied. This is particularly important during hot weather, as rapid drying can lead to cracking and weakening of the newly applied material. Day work joints can be difficult to disguise even on painted work. On lined out stucco the course lines should be used to mask them by cutting away some of the previous days work to 'key in ' the new work. Unlined work should be finished at some physical break in the building. If this is not possible true level lines should be struck off before continuing to prevent the appearance of any ragged edges.
Roughcast
Before carrying out any repair to roughcast, its qualities should be carefully analysed as this can help identify some of the ingredients such as lime, earth, sand, stone dust, brick dust, pebbles, gravel, grit, dung, ash, hair, and crushed glass. As with a render repair the mix of the new work must be compatible or weaker then the mix of existing materials and each coat a weaker mix than the preceding one. The wetness of the mix for casting depends on the final texture required. The dryer the mix, the more lumpy and coarse textured the finish: if too wet, then the mix will splash off the wall when thrown.
Once the render, floating and butter coats have been applied then the cast coats can be thrown onto the wall using a casting float or small coal shovel. Typical mixes might be 2/5 lime: sharp sand or 1/2.5/0.5 lime: sharp sand: pea grit, the later mix giving a coarser finish. The float or shovel is dipped into a bucket of casting mix and then flicked in a backhand motion towards the spot to be covered. Where small patches are to be repaired and any trowelling might damage the existing roughcast, then the whole of the repair may be completed by building up several cast coats. Where the finished roughcast appears too coarse then a wetter, finer mix can be applied to fill up between protruding lumps. As with smooth render once the roughcast has completely dried it can be lightly sprayed with water and then lime washed. Dampening of the surface prevents the lime wash from drying out to quickly.